Kitchen Lighting Layout: Creating the Best Lighting Plan for Your Kitchen
Putting together a kitchen lighting layout is a matter of layering your various lighting needs into a productive and attractive whole.
While it is fun to consider how to light all of the various locations in a kitchen, a kitchen lighting layout ties all of those ideas together. It helps you find where exactly each light will go so that they all work together as a whole. While professional designers do this as a matter of course, you don’t have to be a professional designer to make use of a lighting plan. What I will do is to provide a step-by-step method for designing a kitchen lighting layout that you can use when either doing it yourself or that you can use when discussing what you want with your contractors.
The overall method I will use is called “layering”. Layering puts one “layer” of light on top of the other, each layer correcting some of the faults of the previous layer. Once you have brought all of the layers together, you will have a complete kitchen lighting layout.
Step One: The Floor Plan.
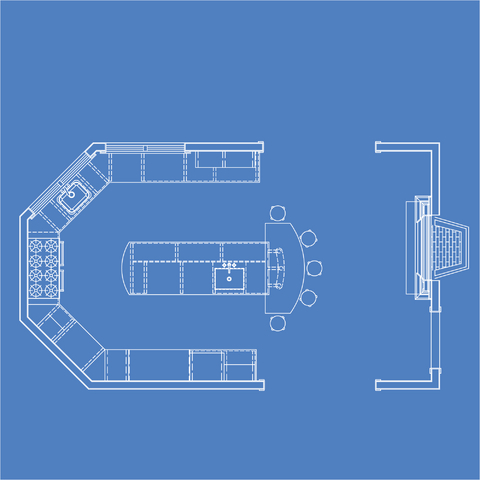
It is easiest to plan your kitchen lighting layout using a floor plan.
However, if you don’t have ready access to a room plan, this is easily fixed. There are a number of high-quality programs such as HGTV Home and Landscape Platinum Suite 3.0 that will let you easily create and print floor plans for your use.
Next, draw your actual furniture and fixtures into the plans. Set fixtures like cabinets may already be in your floor plan, but portable furniture like tables and chairs probably won’t be. Draw the intended location of all of these objects onto the floor plan.
Step Two: The Food Preparation Area.
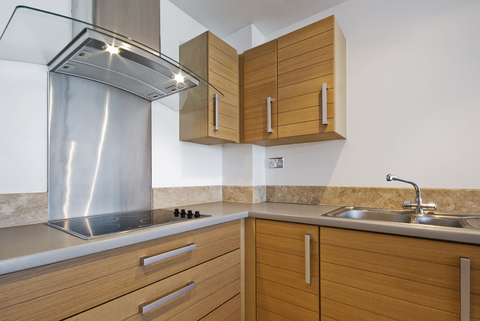
Most inbuilt stove hood lights are halogen, a pink light that distorts food color.
- For all of your counter tops that have cabinets above them, place lighting underneath those cabinet tops. Check if your cabinets have or will have a wooden bar separating them underneath. If they do, you will need to put a unique fixture under each cabinet. If they do not, you can put a single large fixture or connected fixtures.
- If your sink is not under a counter top, you’ll need to light it correctly. There are a couple of options. You can either have a light built in directly over the sink, or you can even use a clip-on spotlight to light the sink. Whichever style you choose, just be sure that the light is over the sink itself, not behind the person using the sink.
- If your stove hood uses a built-in light that is either incandescent or halogen, you should supplement this with white fluorescent or LED light fixtures. Incandescent and halogen lights are pink lights, and they will distort the color of your food, leading to overcooking, for example. This light can be placed above the cooking area on the wall or you can even replace the bulb in the stove hood.
- Now is the tricky part: lighting counter space that is not under cabinets. There are a lot of choices here. If the counter is against the wall, you may simply use a wall-mounted light that shines down onto the cabinet (though you should use an opaque shade to prevent light from going into people’s eyes). If it is not against the wall, you may use ceiling lighting fixtures to light the space, but be sure not to put the ceiling lighting behind the people who are using the area. For a functional kitchen island, then, you are pretty much limited to light directly from above.
Step Three: Lighting People
Congratulations, you have now created an ideal kitchen lighting layout for your robotic butler! All task areas are well-lit and the kitchen will be functional. However, for those of you who might not have a robotic butler, it is important to light people’s faces as well. Fortunately, this is a fairly straightforward task.
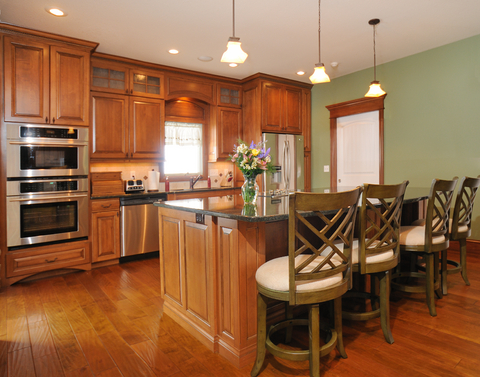
Multiple pendants spread out sources of light, avoiding light bombs.
- The main area that people will be congregating in your kitchen will likely be the dining nook (the semi-official term for any dining area in a kitchen, whether or not it is actually in a nook). Therefore, it merits some special attention. The most common way of providing some extra light to this area is to use a pendant or built-in light source above the table.
Having such a light is a great idea, and you will likely want to use one. Nonetheless, it should not be your only way of lighting the table. Such a light would be too bright relative to its surroundings and would actually dim the whole room my causing people’s irises to contract.
- Other overhead lighting can really help with your overall kitchen lighting layout. You can use pendants to create attractive light throughout the room. With pendants, there is really no way to know how many will fill a given area with the correct amount of light without looking at the fixture. The main thing not to do is overtax any single pendant, for the reasons mentioned above.
- You will also want to have a large amount of ambient lighting for people’s faces. Ambient lighting is lighting that is bounced off of walls and only then hits people’s faces. This lighting is best for people because it is shadowless, completely glareless, and relatively even. There are a number of great spots to put ambient lighting. Above-cabinet lighting bounces light off of the walls and ceiling. Wall sconces with opaque shades bounce light off of the walls. Wall-washing lights, recessed lighting that hits your walls, can also be a source of ambient lighting.
Step Four: Putting It All Together
You’re not quite done. There are a few other things that you should look at when making decisions about your kitchen lighting layout:
- Accent Lighting: You may wish to add some lighting for artwork or other highlights within your kitchen. For these places, place a source of light that illuminates the object that you want people to see. This may not mean a painting, but china that you wish to illuminate or even something like a row of pots that you think look attractive. For example, in-cabinet lighting that lights your dishes serves as accent lighting, task lighting and ambient lighting. It is always nice to have a couple of accents in any room.
- Smoothing: You should also smooth out your overall light as a part of your kitchen lighting layout. Have a look at your overall layout. Are there any spots that you missed? If you don’t light an area, it will be in shadow. Have a look around for places that didn’t get lit as task lighting or ambient lighting. Those are often perfect spots to put a wall sconce or even an accent light for a a lit painting.
Once you’ve put it all together, congratulations! You now have a kitchen lighting layout that you can show to a contractor or discuss with interior designers. You can also bring it to stores that sell lighting fixtures to show them what you are looking for. Having everything planned out makes it far easier to get exactly what you want from your household lighting.