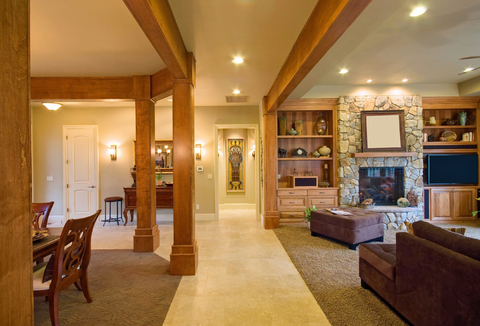
Installing Recessed Lighting: Information for Getting Professional-Looking Ceilings
Useful information for installing recessed lighting on your ceilings.
Installing recessed lighting is a combination of three different jobs. First, you need to plan out your recessed lighting. This is a more complicated process than with many other light sources, and I have discussed it in my articles on recessed lighting layouts and recessed lighting spacing. Second, you need to create holes within your ceiling for your recessed lighting cans. Finally, you will need to install the actual cans themselves. Please note that I am not a professional electrician and the below is for information purposes only.
Laying Out Your Recessed Lighting
As I have already written complete articles on recessed lighting layout and recessed lighting spacing, I will not repeat all of that information here. However, I will quickly summarize some of the main points:
Planning out your recessed lighting can be the trickiest step.
Recessed Lighting Spacing: Each form of recessed lighting has a “Spacing Criterion” that you can use to calculate your the minimum distance that should be between any of your recessed lights to ensure that your overall lighting is as even as possible. In order to discover this minimum distance, you multiply this spacing criterion from its mounted height, which is the distance from the fixture to the surface you are trying to illuminate. Remember that in some cases you might be illuminating something other than the floor, so your lights will need to be closer together.
Please see the more detailed articles about these subjects for more information. I will now discuss the process by which the lights are actually installed.
Working With Your Ceiling
Before you even start to cut into your ceiling for installing recessed lighting, there are a number of steps that you must take:
Protect Your Furniture: Cutting into your ceiling will spread dust absolutely everywhere in the room where you are installing the new lighting. This is especially true in the case when installing recessed lighting because you will be drilling numerous holes into your ceiling. You should remove all of the contents from your room and lay a covering over your carpet if you have one. Also, the dust is significant enough that you should open your windows and block any gaps into other rooms. For the actual sawing, you should wear safety goggles.
Clearing Out Your Ceiling: When installing recessed lighting, you may find that there are a number of wires in your ceiling that are not necessarily connecting to the room you are working in. In fact, you may have no idea where they are going at all. Turning off a single breaker, therefore, will not help. If you are at all confused about the wires in your ceiling and their function, I recommend hiring an electrical professional.
Even once you have cleared out the wiring and have turned off the appropriate breakers, you should use a “live-wire tester” to check which wires might still have live current in them. Sometimes breakers or wires are faulty or you or even your electrician has made a mistake. A live-wire tester is a small, pen-like device that lights up and makes a “beeping” sound when you place it near a live wire.
Avoiding Affixing Beams: Unlike almost all other ceiling lighting installation, you will want to avoid your affixing beams when installing recessed lighting. Recessed lighting cans can only be placed in areas of your ceiling that are free from any blockage. If you have access to your attic, this is quite easy, as you can simply look. If you do not, you can find beams by using a “Studsensor” device which can find clear areas of the ceiling for you.
Finding the affixing beams may cause you to alter your planned layout a little, as a spot you had chosen for a light might actually include a beam (in fact, this is likely to happen at least once). Simply shift your plan around a little bit until you find an arrangement where you will hit no beams and your new layout will still have cans that are below the maximum distance apart.
Drill Your Holes: There are broadly two ways of cutting holes in your ceiling for your recessed can when installing recessed lighting. The first is to draw a circle based on the specifications marked on your recessed cans, and then to use a simple drywall saw to cut along the line. Don’t do this unless you have some practice, as cutting circular holes can be tricky.
The other option is to purchase or rent a hole saw. These saws either come with attachments of different widths or have a single, “infinitely adjustable” head that can be made larger or smaller depending on your needs. The circular head of these saws will put the holes in your ceiling at exactly the right (and exactly the same width) as is required by your specifications. Just make sure to center the circular head properly.
Installing Recessed Lighting Housings
There are several different types of recessed can for installing recessed lighting. For remodelling, you will want to purchase “remodel cans”, not “new construction cans”. Remodel cans are easily recognizable, because they do not have brackets for affixing them to your beams. New construction cans should only be used if you are planning to replace your entire ceiling, or if your ceiling is easily removed (such as if you are using ceiling tiles).
The flanges on this remodel can are used to attach the fixture directly to your ceiling. This model is available at Amazon
You will now need to wire your recessed housing before you fix it in place. This is the same process as wiring any other light fixture, but there are some special things to take into consideration. Since you will be running all of the lighting in parallel off of a single circuit, you will need to make sure that you do not overload the circuit. Add up the total amount of all of your recessed lights combined to ensure that this does not happen. In addition, if you are using dimmer switches, they have a maximum load capacity. Make sure that the total wattage of your recessed lights does not overload the dimmer. Several recessed fixtures can add up very quickly in their wattage, though if you are using energy-saver light bulbs, you should probably be all right.
Finally, it is time to snap the housing into place. Remodel cans have pressure flanges that simply snap into place when they are placed in the appropriate-sized holes. Make sure that the wires are threaded through the back of the housing, and then snap the housings directly and securely into place. At that point, you can simply insert and plug in your recessed fixtures and enjoy your new lighting.
Putting It All Together
Installing recessed lighting is a complex process:
- First, you need to ensure that you have appropriately planned your recessed lighting, both in terms of its overall arrangement and in terms of its spacing.
- Next, you need to make sure that the area above your ceiling is safe and clear.
- Next, you need to cut appropriately-sized holes in your ceiling.
- Finally, you need to complete your wiring and plug in your recessed lighting fixtures.
As with any project involving electricity, please consult a professional electrician if you feel uncomfortable with any part of the process.
Back from Installing Recessed Lighting to Recessed Lighting Fixtures
Back from Installing Recessed Lighting to Home Lighting Tips